
這篇文章要討論的是 XML 格式的 sitemap,而不是有時在一些網站上會看到的『網站地圖』頁面內容(HTML sitemap),而 XML sitemap 內的 URL 資訊以及附帶的 metadata 主要功能在於幫助搜尋引擎暸解一個網站內的連結以及所對應的頁面的一些額外資訊(如:最後修改時間、修改頻率...等)。
最基本的內容大概會像下方範例。當中可以發現 <url> tag 裡除了 <loc> 為必要的資訊外其他都可以選擇性填入。而目前支援 standard sitemap protocol 的搜尋引擎包含了 Google、Yahoo!、Microsoft。
<?xml version="1.0" encoding="UTF-8"?>

<urlset xmlns="http://www.sitemaps.org/schemas/sitemap/0.9">

   <url> # 第一組 URL

      <loc>http://www.example.com/</loc> # 必填

      <lastmod>2005-01-01</lastmod> # 選填

      <changefreq>monthly</changefreq> # 選填

      <priority>0.8</priority> # 選填

   </url>

   <url> # 第二組 URL

      <loc>http://www.example.com/blog</loc>

   </url>

</urlset>
Sitemap 與 SEO
Sitemap 與 Search Engine Optimization (SEO) 之間的關聯,常見的迷思大概有:
- 做了 sitemap 網頁就能在搜尋結果頁中出現
- 做了 sitemap 能提升網頁在搜尋結果頁(SERP)中的排名
- 不做 sitemap 網頁還是會出現在 google
前面兩點,大概可以用『買了兩塊肋眼牛肉回家就會自動變成情人節晚餐』比擬,而 sitemap.org 的說明是:
Sitemaps are an easy way for webmasters to inform search engines about pages on their sites that are available for crawling ... (略) ... so that search engines can more intelligently crawl the site.
當中說明了 sitemap 的作用在於讓搜尋引擎知道網站的存在以及當搜尋引擎在爬網站時能夠更有效率。這裡有兩個重點:
- available for crawling 意思是告訴搜尋引擎網站的 sitemap 已經準備好了,但不保證搜尋引擎的 crawler 什麼時候會爬
- crawl 不等同 index 。意即,搜尋引擎爬了也不保證會收錄,即使收錄也與 SERP 排名沒有直接關係
關於迷思的最後一項,確實,即使不做 sitemap ,網頁也是有機會被爬並出現在SERP。
那...為什麼還要做?
搜尋引擎爬網站的速度與頻率,如同很多其他 SEO 因素,沒有標準答案。然而國外有些實驗比較網站沒有 sitemap 與有 sitemap 時搜尋引擎爬的速度差異,當中有一個實驗測出結果是,有 sitemap 時,搜尋引擎平均爬的時間是14分鐘,而沒有 sitemap 時是1,375分鐘。
相較於其他 SEO 因素,Sitemap 在提升排名方面或許沒有太大的幫助,但可以確定的是可以加快網頁被爬的速度。畢竟,在進一步優化 organic traffic 前先確保網頁出現在 SERP 會比較好。
在 Rails Web App 上實作 sitemap
以下是這次簡易實作範例的範圍,sitemap 部分使用 sitemap_generator gem。
- 建立新專案、新增 articles CRUD
- 產生部落格首頁與文章頁的 standard sitemap
- 新文章產生後動態更新 sitemap
- 提交 sitemap
建立新部落格專案、新增 blog CRUD
建立專案
$ rails new index_me_google
$ cd index_me_google
$ rails db:create
因為是為了練習 sitemap,快速 scaffold 出 Article ,欄位部分就只給了一個 title。
$ rails g scaffold Article title
$ rails db:migrate
另外設定一下首頁路徑
# routes.rb
root 'articles#index'
resources :articles
在 console 裡建立一些 articles
(1..5).each{ |num| Article.create(title: "article-#{num}")}
產生部落格首頁與文章頁的 standard sitemap
sitemap_generator 功能相當完整,從壓縮、ping 搜尋引擎這類貼心功能到支援 sitemap extensions(news, video ... 等),如果不是太奇特的需求,基本上這個 gem 都能幫忙做到。
安裝
# Gemfile
...
gem 'sitemap_generator'
...
產生設定檔
$ rails sitemap:install
完成後會發現 config 資料夾下多了一個 sitemap.rb 檔案。初始檔案裡面只有幫我們預設一個 default_host 選項還有一個空的 create block。
# config/sitemap.rb
SitemapGenerator::Sitemap.default_host = "http://www.example.com"

SitemapGenerator::Sitemap.create do

end
sitemap_generator 產出的 sitemap 預設為壓縮檔,為了方便檢查之後產出的 xml 檔案內容,在開發階段通常我會將 compress 選項改為 false,另外記得將 default_host 改成自己的 domain。
# config/sitemap.rb
SitemapGenerator::Sitemap.default_host = "http://www.index.me"
SitemapGenerator::Sitemap.compress = false
...略...
接下來,在 create block 內加入我們想要放入 sitemap 內的 URL。
# config/sitemap.rb
...略...
SitemapGenerator::Sitemap.create do
  Article.find_each do |article|
    add article_path(article), lastmod: article.updated_at
  end
end
在操作上相當簡易, add 方法接收的第一個參數是路徑,第二個是 hash 選項,預設的選項為:
{ priority: 0.5, changefreq: 'weekly', lastmod: Time.now, host: default_host }
可以留意的是, crawlers 不一定會因為我們把 priority 設為 1 或 changefreq 設為 always 就增加重爬的頻率,把這些數值想成是給 crawlers 做決定的線索就好。另外,雖然有預設值,前三個選項不一定都需要(如:google 目前不採用 priority),可以視情況調整使用。
執行 $ rails sitemap:create 後產生一個 sitemap.xml 檔案,預設位置在 public 資料夾下。直接開瀏覽器檢查一下(localhost:3000/sitemap.xml)。設定正確的話會發現除了所有 article 的 URL 被寫入外,額外附贈 root http://www.index.me,如果不想要的話需要將設定選項 include_root 改為 false。
<urlset>
  <url>
    <loc>http://www.index.me</loc>
    <lastmod>2019-02-13T16:45:39+08:00</lastmod>
    <changefreq>always</changefreq>
    <priority>1.0</priority>
  </url>
  <url>
    <loc>http://www.index.me/articles/1</loc>
    <lastmod>2019-02-13T05:14:31+00:00</lastmod>
    <changefreq>weekly</changefreq>
    <priority>0.5</priority>
  </url>
  <url>
    <loc>http://www.index.me/articles/2</loc>
    <lastmod>2019-02-13T05:14:31+00:00</lastmod>
    <changefreq>weekly</changefreq>
    <priority>0.5</priority>
  </url>

  ...略...

</urlset>
新文章產生後動態更新 sitemap
到目前為止,我們成功為『現有』的 articles 建立 sitemaps,但像是部落格文章或者是新聞之類不定期會新增或的動態頁面也需要 sitemap。比較常見的做法有使用 cron jobs 定時更新 sitemap,或者在頁面新增後立刻更新。
如果使用 cron jobs,可以參考搭配 whenever gem 使用;如果是後者, sitemap_generator 提供了對應的方法:
class ArticlesController < ApplicationController

  ...略...

  def create
    @article = Article.new(article_params)

    respond_to do |format|
      if @article.save
        # 建立 sitemap
        SitemapGenerator::Interpreter.run(config_file: Rails.root.join('config', 'sitemap.rb'))
        # ping 搜尋引擎
        SitemapGenerator::Sitemap.ping_search_engines

        ...略...

      end
    end
  end

  ...略...

end
這樣基本上就能達到新增頁面後立即更新 sitemap 的效果,但建議可以把相關的行為用一個 job 處理。
提交 sitemap
在提交 sitemap 到搜尋引擎之前,還要準備一個置放在 server 頂層資料夾的 robots.txt 檔,作用在於指示 crawlers 該如何爬網站,當中也包含了提供 sitemap 位置的資訊(暸解更多關於 robots.txt 使用方式)。 這裡只簡單做出允許所有搜尋引擎爬站並提供 sitemap 位置。
User-agent: *

Sitemap: http://www.index.me/sitemap.xml
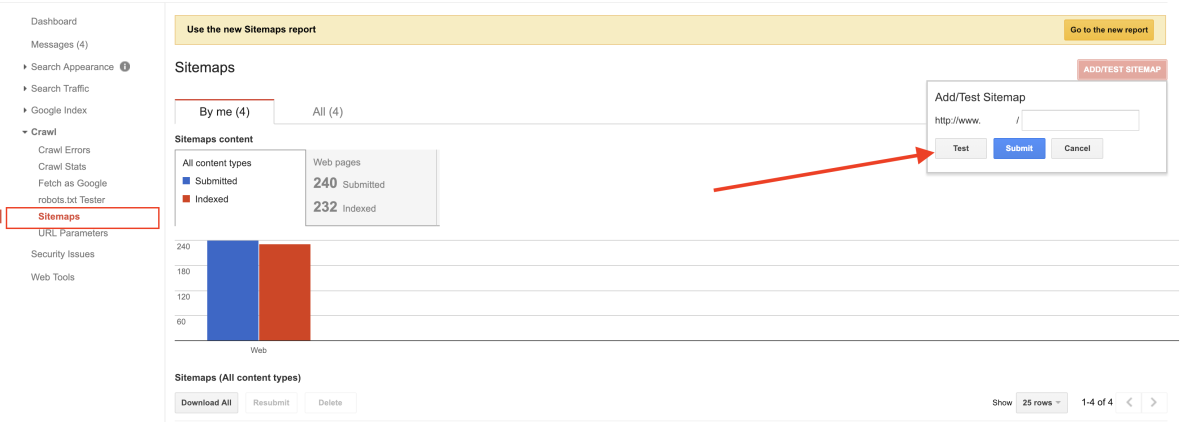
以下使用 Google Search Console 為例提交 sitemap。
如果是第一次使用,必須先新增網站並驗證所有權。另外,新版的 google search console 沒有提供提交前測試的功能,如果有需求可以切到舊版使用。
填寫 robots.txt 網址測試

填寫 sitemap.xml 網址測試,如果測試結果正常,就可以正式提交了!過一段時間再回來 search console 就可以看到網頁被收錄的狀態。
結語
Rails 搭配 sitemap_generator 實作 sitemap 並不困難,所需時間成本也不高。雖然對於網站 SEO 沒有什麼直接加分的效果,個人會比較用『有好無壞』以及『SEO第一步』的角度看待。另外,如果有多餘心力,建議可以研究 sitemap extensions,增加網頁在搜尋引擎的足跡。
👩🏫 課務小幫手:
✨ 想掌握 Ruby on Rails 觀念和原理嗎?
我們有開設 🏓 Ruby on Rails 實戰課程 課程唷 ❤️️